Upgrade SQL Server Instances from Eval to Standard

The procedure describe the upgrade from SQL eval to SQL Standard edition.

The follwoing tpoics are important before starting the process:
• If you have an volume license you get no key. The Key is in the downloaded ISO hard set.
• The upgrade must be done for every existing SQL instance step-by-step
• The SQL instances will be restartet in the process

ATTENTION: This upgrade can be undone and will restart the upgrading SQL instance.

Check the actually edition on Server -> Evaluation Edition

Download iso file from for Microsoft license portal, mount iso file"Microsoft SQL Server 2022 English x64" to VM and run setup.exe
In the "SQL Server Installation Center" click on "Maintenance" and "Edition Upgrade"
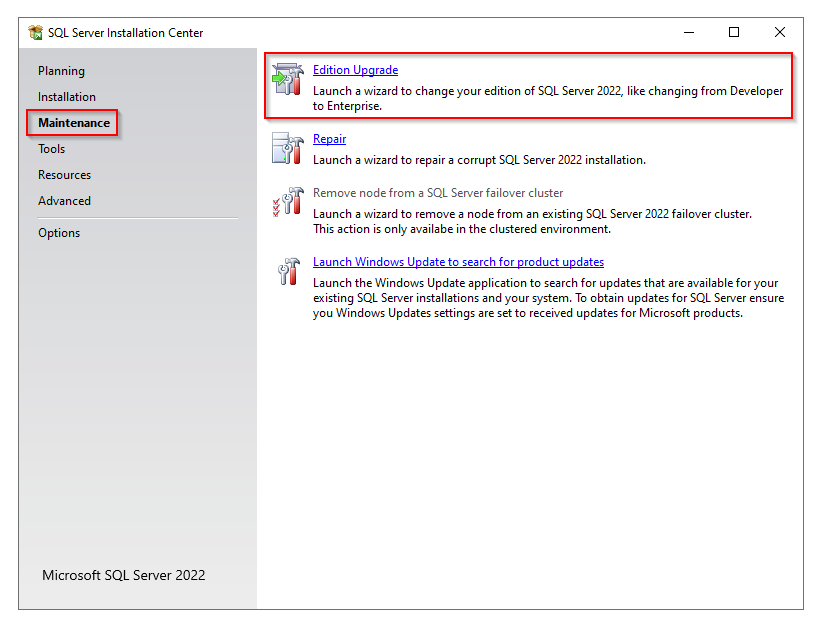
The Edition Upgrade Wizard will start and we have to select the correct license type.
ATTENTION: The product key will be automatically filled from the iso file when we have an volume license SQL server and downloded the iso file from your license portal.
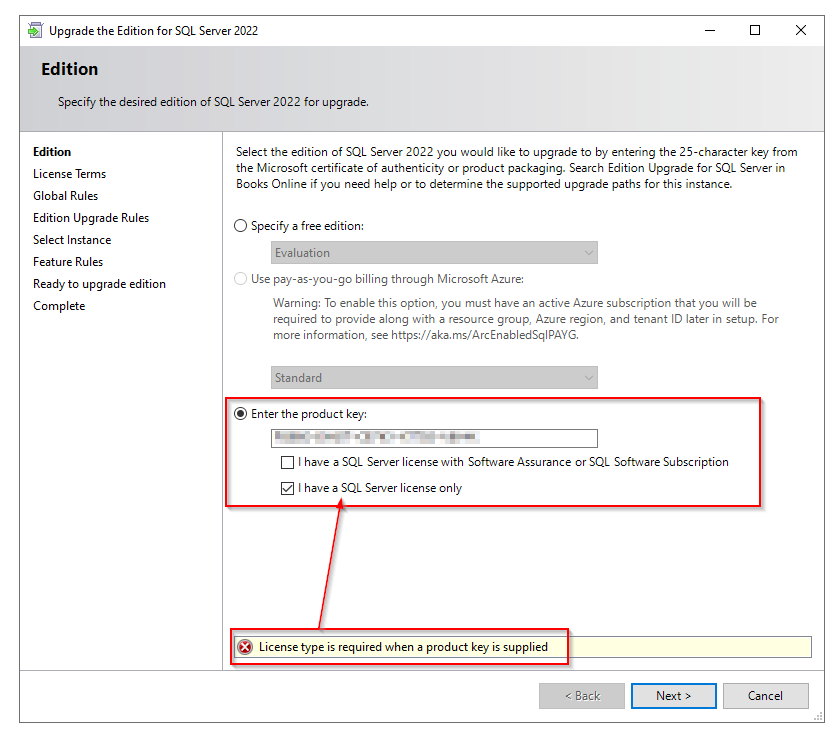
After clicking next we have to accept the EULA

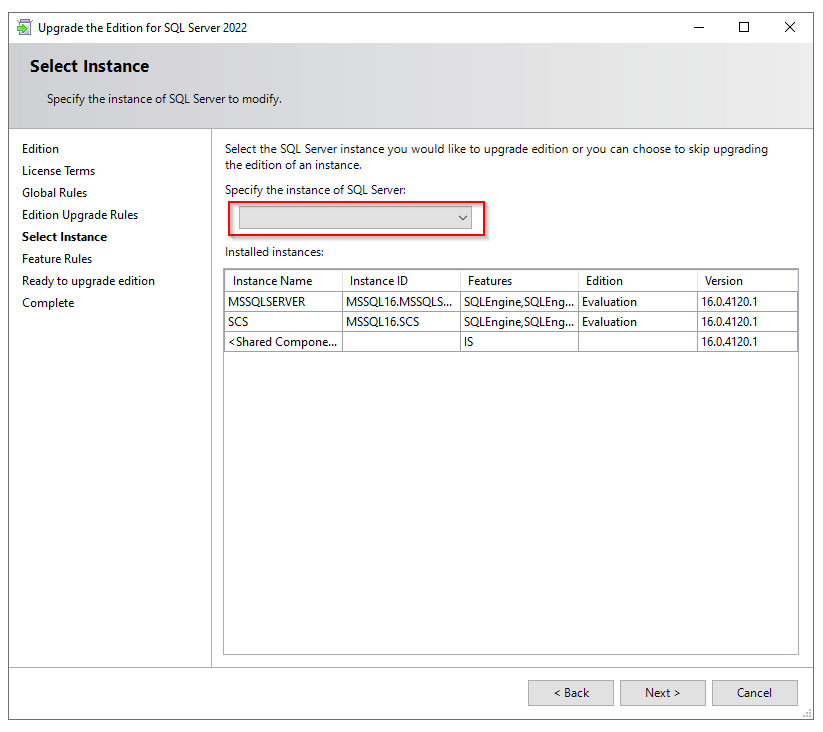
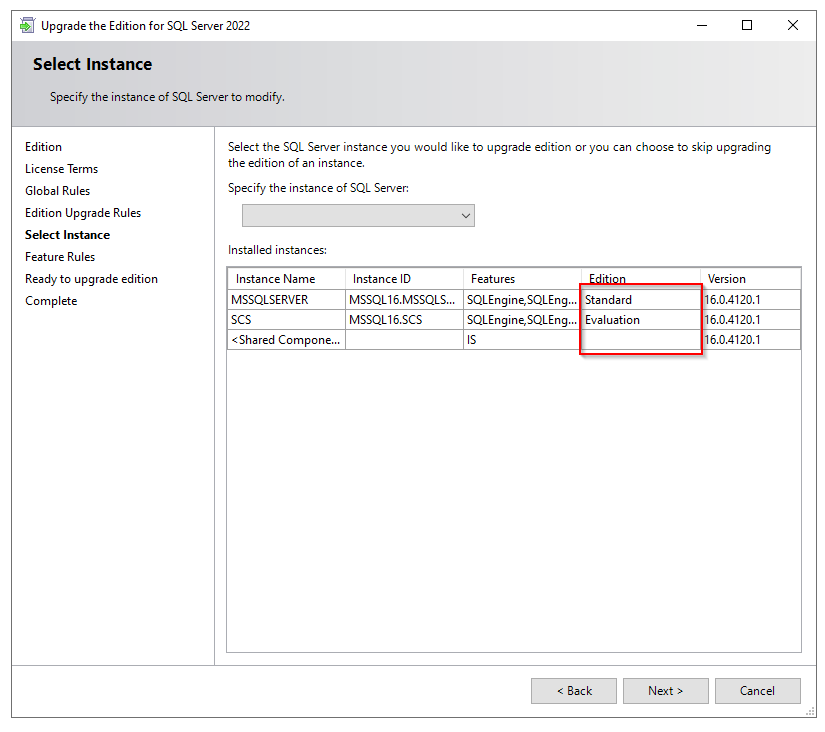
Now we can specify the SQL instance which we would like to upgrade.
IMPORTANT: The upgrade must be done for ALL instances!!
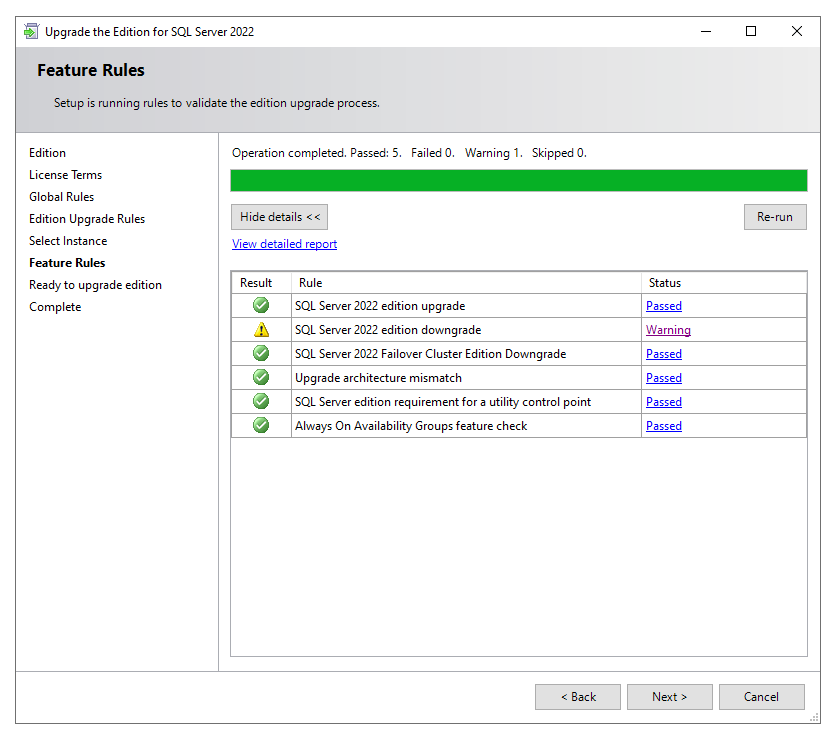
At the first run the wizard will check if the key, license and installed optionals are valid.
HINT: The warning of the downgrade can be ignored because the eval version has more features than the standard edition
Now we can start the upgrade process
ATTENTION: This upgrade can be undone and will restart the upgrading SQL instance.
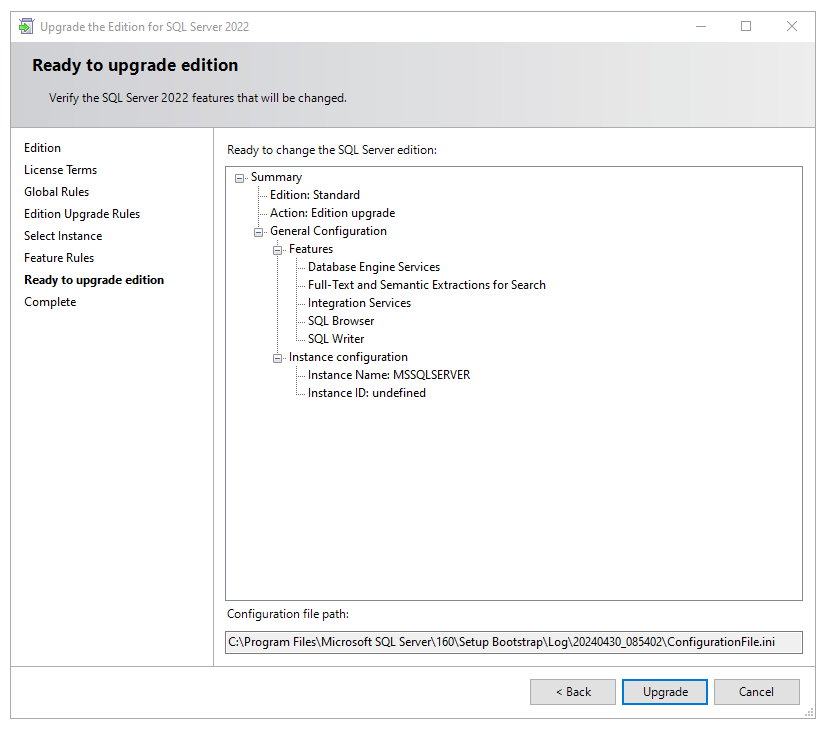
Database and Agent service will be restarted in this upgrade process
After upgrading we get a summary for the done steps
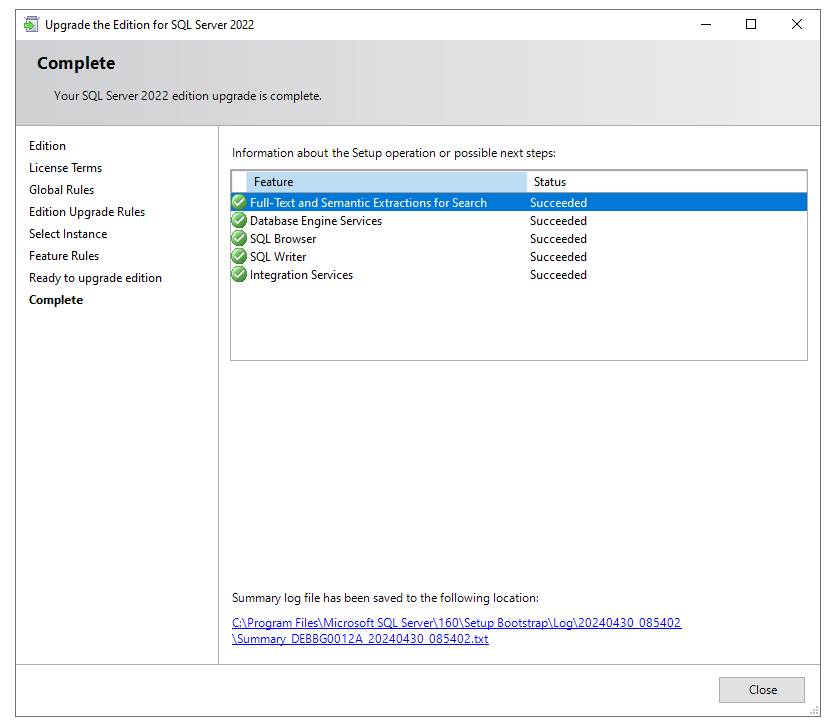
ATTENTION: This procedure must be done for ALL existing SQL Instances.
New one will automatically created as standard instances.
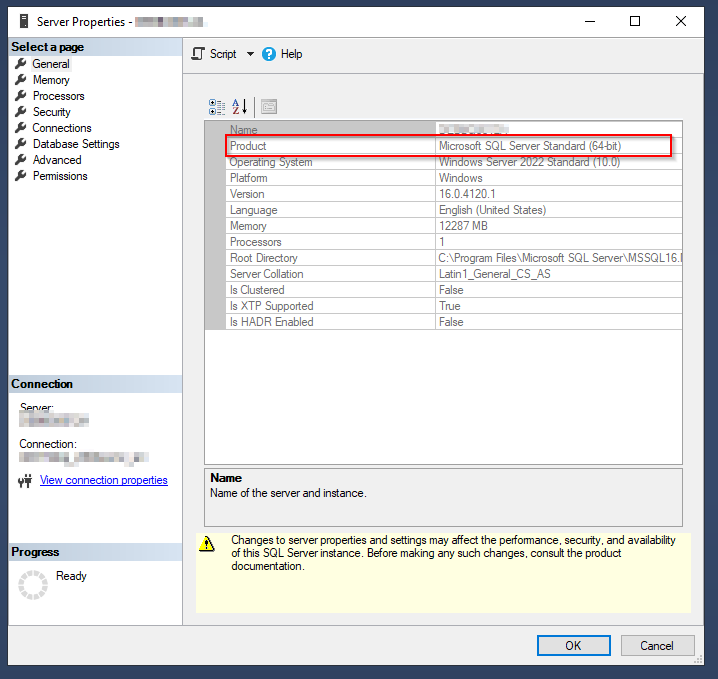
After upgrading all instances we can check the SQL server edition in the Studio again:

Sources of Information:
Upgrade Microsoft SQL Server Evaluation Edition to Standard/Enterprise | Windows OS Hub (woshub.com)
Upgrade SQL Server from Evaluation Edition to Standard or Enterprise (mssqltips.com)


VMWare: Installationsfehler "Die Microsoft-Software-Lizenzbedingungen wurden nicht gefunden"

Problem:
Bei der Installation eines Windows Betreibssystems unter VMWare oder VMWare Workstation kommt es zu folgendem Fehler:

Die Microsoft-Software-Lizenzbedinungen wurden nicht gefunden. Stellen Sie sicher, dass die Installationsquellen gültig sind, und starten Sie die Installation erneut.

Lösung:
Die Lösung ist einfach wie simpel. Windows scheint hier ein Problem mit dem Floppy zu haben. Entfernen Sie das Floppy-Laufwerk in der Hardwareliste der VM und führen Sie die Installation erneut durch. Diese wird nun fehlerfrei durchlaufen.

Activation windows server via KMS Server

First, we must set a generic volume license key on the server. Every server edition has a unique generic key.
Start the command "systeminfo" in a command prompt to see what Server Edition you need:
systeminfo | find "OS"


You find the commands to install the correct keys in the following list.
Install Product Keys
This step is not needed if you have converted the server from eval to standard/datacenter edition because you installed the key at the process of converting.

Please enter the following command depend of your server edition and version in an administrative command prompt.

cscript.exe c:\windows\system32\slmgr.vbs /ipk CB7KF-BWN84-R7R2Y-793K2-8XDDG


Start activation via KMS server
Now activate the windows server edition.
cscript.exe c:\windows\system32\slmgr.vbs /ato


Show KMS activation information
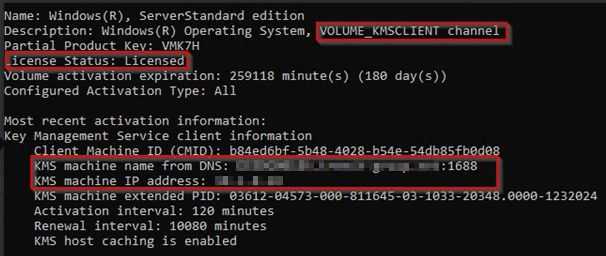
The next command shows you the state of activation.
cscript.exe c:\windows\system32\slmgr.vbs /dli


Convert a MAC key activated server to KMS activation
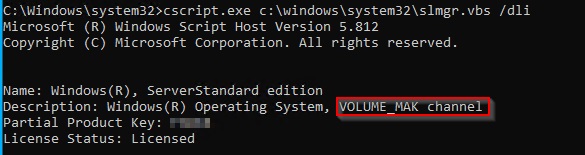
If a server is already activated with an MAC key looks like this:
cscript.exe c:\windows\system32\slmgr.vbs /dli


You can simply do the same procedure to install the generic key and activate!

Delete an existing MAC key if necessary
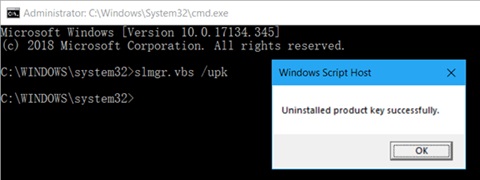
If you have trouble to overwrite the existing MAC key, you can delete the existing windows key with this command:
cscript.exe c:\windows\system32\slmgr.vbs /upk


ATTENTION: After this command the windows is not activated!
Now you install and activate the KMS key as descripted above.

Microsoft Source of KMS Keys: Key Management Services-Clientaktivierung (KMS) und Product Keys

Convert Windows Server Evaluation to Standard/Datacenter Edition

Problem:
You want to convert your windows server evaluation edition to a standard or datacenter edition.

Solution:
Before we can activate the server via KMS or MAC we need to convert the evaluation edition into an standard or datacenter.

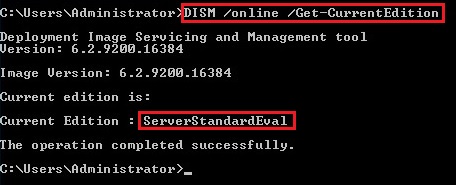
Check the current Edition

DISM /online /Get-CurrentEdition

Here you see the server edition. If it is an ServerXXXEval you must convert the server edition into standard or datacenter


Check the possible target editions

To check the possible target edition, you can execute the next command:

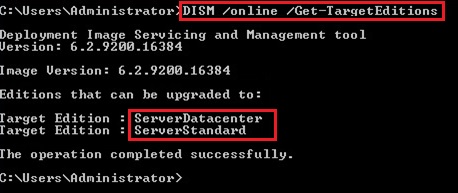
DISM /online /Get-TargetEditions


Convert the eval to standard or datacenter edition

ATTENTION: The next step will need an intermediate reboot of the server!!
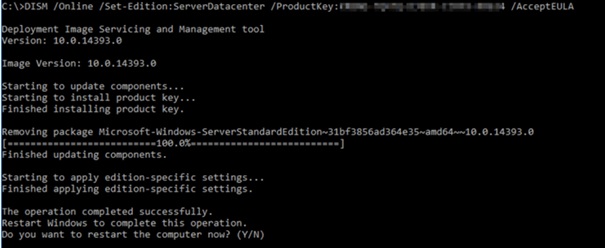
Now you can convert your evaluation edition to the target edition with the command below:

Standard:
DISM /online /Set-Edition:ServerStandard /ProductKey:XXXXX-XXXXX-XXXXX-XXXXX-XXXXX /AcceptEula

Datacenter
DISM /online /Set-Edition:ServerDatacenter /ProductKey:XXXXX-XXXXX-XXXXX-XXXXX-XXXXX /AcceptEula


For the product key please use the generic volume license keys from the table below. With this keys you can also activate the server via KMS. If you have MAC Keys please use this keys for converting.

Server 2025 Standard TVRH6-WHNXV-R9WG3-9XRFY-MY832
Server 2025 Datacenter D764K-2NDRG-47T6Q-P8T8W-YP6DF
Server 2022 Standard VDYBN-27WPP-V4HQT-9VMD4-VMK7H
Server 2022 Datacenter WX4NM-KYWYW-QJJR4-XV3QB-6VM33
Server 2019 Standard N69G4-B89J2-4G8F4-WWYCC-J464C
Server 2019 Datacenter WMDGN-G9PQG-XVVXX-R3X43-63DFG
Server 2016 Standard WC2BQ-8NRM3-FDDYY-2BFGV-KHKQY
Server 2016 Datacenter CB7KF-BWN84-R7R2Y-793K2-8XDDG

VMWare Workstation: Netapp Simulator hängt scheinbar beim Booten

Problem
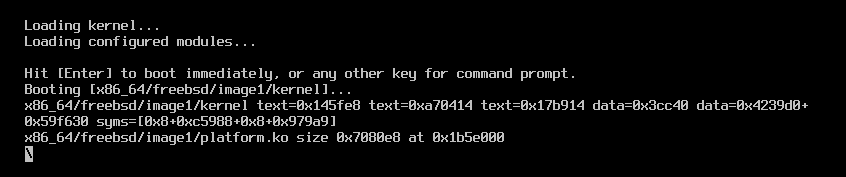
Nach der initialen Einrichtung des Netapp Simulators unter VMWare ESX oder VMWare Workstation scheint das ONTAP beim Starten stehen zu bleiben. Nach einigen Minuten ist der Node oder Cluster aber per SSH und HTTPS erreichbar.


Lösung
Leider handelt es sich hier um einen BUG, der nicht gefixt wird (weder VMWare noch Netapp).
Entweder man ignoriert das Verhalten, da der Cluster bzw. Node nach der Bootvorgang ganz normal erreichbar ist, oder man kann im VLOADER anpassen, damit die Anzeige korrekt ist. Das ist vor allem im Fehlerfall hilfreich!
Die Anpassung muss aber JEDES MAL gemacht werden und ist nicht persistent:

- Bootvorgang des Nodes am Anfang (Countdown) mit einer non-Enter-Taste unterbrechen.
- Der Prompt "VLOADER>" wird angezeigt
- Hier den Befehl "setenv screen.textmode 1" eingbene
- Bootvorgang mit dem Befehl "boot_ontap" starten
- Die Anzeige ist nun korrekt und der Bootvorgang wird vollständig angezeigt


Quelle:
ONTAP Select node 9.13.1 appears to hang during boot

VirtualBox: Set DmiSystemVendor Installation ROK Datenträger Windows

Problem:
Wir wollten einen physikalischen Server inkl. Applikation auf einen virtuell Server umziehen und from scratch neu installieren (kein P2V). Hierzu mussten wir die originalen Installationsmedien des Herstellers verwenden, da es sich um eine ROK-Lizenzen gehandelt. Bei der Installation in einer VM unter VirtualBox kam der Hinweis, dass das installationsmedium Vendor branded ist und die Installation bricht ab.

Lösung:
Man kann der VM unter VirtualBox einen Vendor BIOS Tag mitgeben, damit die Installation funktioniert. Das konnten wir bei Fujitsu und HP sauber abbilden.

Folgende Befehle haben hier den Vendor im BIOS gesetzt:

Fujitsu
VBoxManage setextradata "Analysis" "VBoxInternal/Devices/pcbios/0/Config/DmiSystemVendor"      "FUJITSU"
VBoxManage setextradata "Analysis" "VBoxInternal/Devices/pcbios/0/Config/DmiBIOSVendor"        "FUJITSU // Phoenix Technologies Ltd."

HP
VBoxManage setextradata "VM Name" "VBoxInternal/Devices/pcbios/0/Config/DmiBIOSVendor" "HP"
VBoxManage setextradata "VM Name" "VBoxInternal/Devices/pcbios/0/Config/DmiSystemVendor" "HP"


Ein überblick aller Befehle findet man hier: Configuring the BIOS DMI Information
“Das einzig sichere System müsste ausgeschaltet, in einem versiegelten und von Stahlbeton ummantelten Raum und von bewaffneten Schutztruppen umstellt sein.”
Gene Spafford (Sicherheitsexperte)